¶ The Basics: 1x1 2D map art
In this guide, we will use the HoloConstruction logo as an example:
![]()
This logo has been preprocessed, changing transparent background to white, and resized to 128x128 dimensions.
Changing transparency and resizing beforehand are optional, as MapartCraft allows setting background colors (which replaces transparent pixels), cropping and resizing images.
¶ MapartCraft steps
To begin, use the link provided with preset materials in Map Art Guides
¶ Inputting your image / Map preview
Drag and drop your image anywhere on MapartCraft website (you can also click on "Pick Image" to browse for your file). From now on, "Map Preview" will automatically show your final image.
¶ Settings
This section is updated as of September/2021. Change (or keep) the settings as follows:
- Mode:
Schematic (NBT)(default)
(The other option gives you a world download) - Version:
1.17.1(default)
(This changes available blocks according to Minecraft version) - Map size:
1x1(default)
(Play around with this setting so you can see how it affects) - Crop:
Center(default)
(Actually doesn't matter, as the input image is already on correct dimensions) - Grid:
☐(default)
(This is just for visualization purposes) - Staircasing:
Off (2D) - Add blocks under:
No blocks
(Reason: Litematica allows you to place floating blocks and no materials in the preset require supporting blocks)
If you include materials that need a supporting block, use
Important blocks.
Note though that, if you don't need it, your schematic will needless have height 2, with an entire Y level empty, and if you build the schematic right above the ocean, water and Kelp will triggerExtra blocksin Schematic Verifier.
Slime Blocks and slabs are wrongly considered to need a supporting block, so have that in mind as well.
- Block to add:
light_gray_wool
(You can also pick any other easily farmable and placeable material) - Better color:
☑(default)
(Play around with this setting so you can see how it affects) - Dithering:
Floyd-Steinberg
(Play around with this setting so you can see how it affects) - Image preprocessing: do not enable for this guide
(Play around with this setting so you can see how it affects)
¶ Saving the image output
In case you want to share the output image, you can right-click the preview image and save it (as PNG format).
To exemplify, below is the original, followed by a 2D version and a 3D version:
![]()
![]()
![]()
You may note how, in 2D, the white background is grayish, and the light blue section lost colors.
¶ Generating the schematic
Click on DOWNLOAD NBT button and save the generated .nbt file in your schematics folder (%appdata%/.minecraft/schematics/), so Litematica can find it. Create the folder if it doesn't exist yet.
You may create subfolders as you wish for organization purposes.
You may now close the MapartCraft website and boot up Minecraft.
¶ Minecraft preparation steps
¶ Finding a good biome
Prefer ocean biomes (except Frozen and Deep Frozen Oceans to avoid snow) for two main reasons, and another additional reason if you're building in 3D:
- When a builder accidentally falls, they won't take fall damage
- The ocean is on Y level 63, and if you want to place the schematic at Y level 64 to make it easier to build for people without Elytra, there will be less blocks to tear down when compared to other biomes
- (For 3D map arts only) The height limit is Y level 319, so you have more freedom to adjust the initial Y level of the schematic.
In overworld main server, a lot of map arts have been built southwest of Red Heart City.
You may also use Deserts, Plains or Swamps, but beware of fall damage (which may be reduced by Feather Falling and Protection enchantments).
¶ Avoid snow forming
Avoid snowy or frozen biomes (not only oceans), so you won't have to deal with snow forming on top of your map art. See https://minecraft.fandom.com/wiki/Snow#Weather for the list of biomes to avoid.
If in dire need, you may place torches diagonally every 2 blocks, as torches have a melt radius of also 2 blocks. You may also use MiniHud mod using its light level feature to double check if blocks inside snowy biomes have light level 12 or more.
¶ Finding the starting location
All MapartCraft schematics (whether 2D or 3D) have an additional top strip line, which needs to be outside the map chunk. This top strip line uses the material listed as "Block to add" and corrects the color of the following actual first line of the map art.
Use an Empty Map on the general location you want to build your map art on, go to the top left corner and activate chunk borders (F3 + G).
Afterwards, move closer to the chunk border and go past it by one block north.
Check this video for reference:
¶ Loading the schematic
When positioned on the starting location, load the schematic with Litematica:
- Open the Litematica main menu (M key)
- Go to
Load Schematics - Find and highlight your desired schematic, having a light gray border (click on the schematic name)
- Keep
Create a placementchecked - Click on
Load Schematicbutton
There will be a warning about loading .nbt files. You may ignore this as this guide teaches you how save it as .litematic format.
Litematica will now render partially transparent blocks, indicating what blocks have to go where.
¶ Adjusting the Y level
You may wish to increase or decrease the Y level of the schematic placement. To do that:
- Open the Litematica main menu (M key)
- Go to
Schematic Placements - Make sure the schematic is highlighted, having a light gray border (if it is not, click on the schematic)
- Click on
Configurebutton - In
Placement Originsection, change the Y level. You may type the desired level, left/right-click on the+_button to increment/decrement, or use the mouse scroll on top of the+_button
Check this video for reference:
¶ Double checking coordinates
It's a very common mistake to build map arts in a wrong location.
Staff will not destroy or move a wrong schematic location due to a player mistake.
To double check, grab a calculator and:
- Keep subtracting or adding the X coordinate by 128. If it reaches 64, it is correct.
- Keep subtracting or adding the Z coordinate by 128. If it reaches 63, it is correct.
This also means that the Z coordinate must always be an odd number.
For map arts, never use Rotation or Mirror features. If in need, preprocess your image first (with an image editor) and then use MapArtCraft.
¶ Saving the schematic
In Loaded Schematics, click on Save to file button to save as a .litematic file. You can now share the .litematic file with others.
¶ Locking the schematic placement
In Configure Schematic placement, click on Locked: OFF button so it becomes Locked:ON to prevent accidental changes to the placement, such as grabbing a Stick and clicking somewhere.
¶ Sharing the location
Using the same window as before (Configure Schematic placement), you may share the coordinates or use Windows 10's Snipping Tool (Windows+Shift+S) to capture an image of the Placement origin section.
Other builders receiving a prepared schematic need only to load and type the coordinates in the same
Placement originsection
¶ Obtaining the material list
In Configure Schematic placement, click on Material List (M + L).
You can sort the lines by the columns (Item, Total, Missing and Available), in ascending or descending order.
You can also click on Write to file button. If you click on it while pressing Shift, a .csv file will be written in %appdata%/.minecraft/config/litematica, named material_list_<timestamp>. Otherwise, a .txt file will be written.
.csv files can be imported to Microsoft Excel, LibreOffice, etc. so you can apply formulas to it.
For instance, you can add=FLOOR(B2 / (27 * 64))to calculate the number of Shulker Boxes needed rounded down, and=CEILING(MOD(B2; 27 * 64) / 64)to the number of remaining item stacks needed, rounded up.
Material List will consider all the blocks you have in your inventory, including Shulker Boxes.
¶ Minecraft building steps
¶ Litematica's easyPlace feature
Firstly, configure Litematica's easyPlace feature, which is disabled by default.
When enabled, you can hold your right-click mouse button and some slots of your hotbar will be managed by Litematica, placing blocks and switching blocks in your hotbar when your mouse cursor points to a schematic's ghost block.
- Open the Litematica main menu (M key)
- Go to
Configuration menu(M + C hotkey) - In
Hotkeys,easyPlaceUseKey, click on the image button beforeRESETand setAllow extra keysto true. - In
Hotkeys,easyPlaceToggle, click on the button and define a hotkey for toggling easyPlace on and off. - Leave Litematica main menu aend hit your newly defined hotkey to toggle easyPlace on.
Having enough materials in your inventory, hold your right-click mouse button while moving through the schematic.
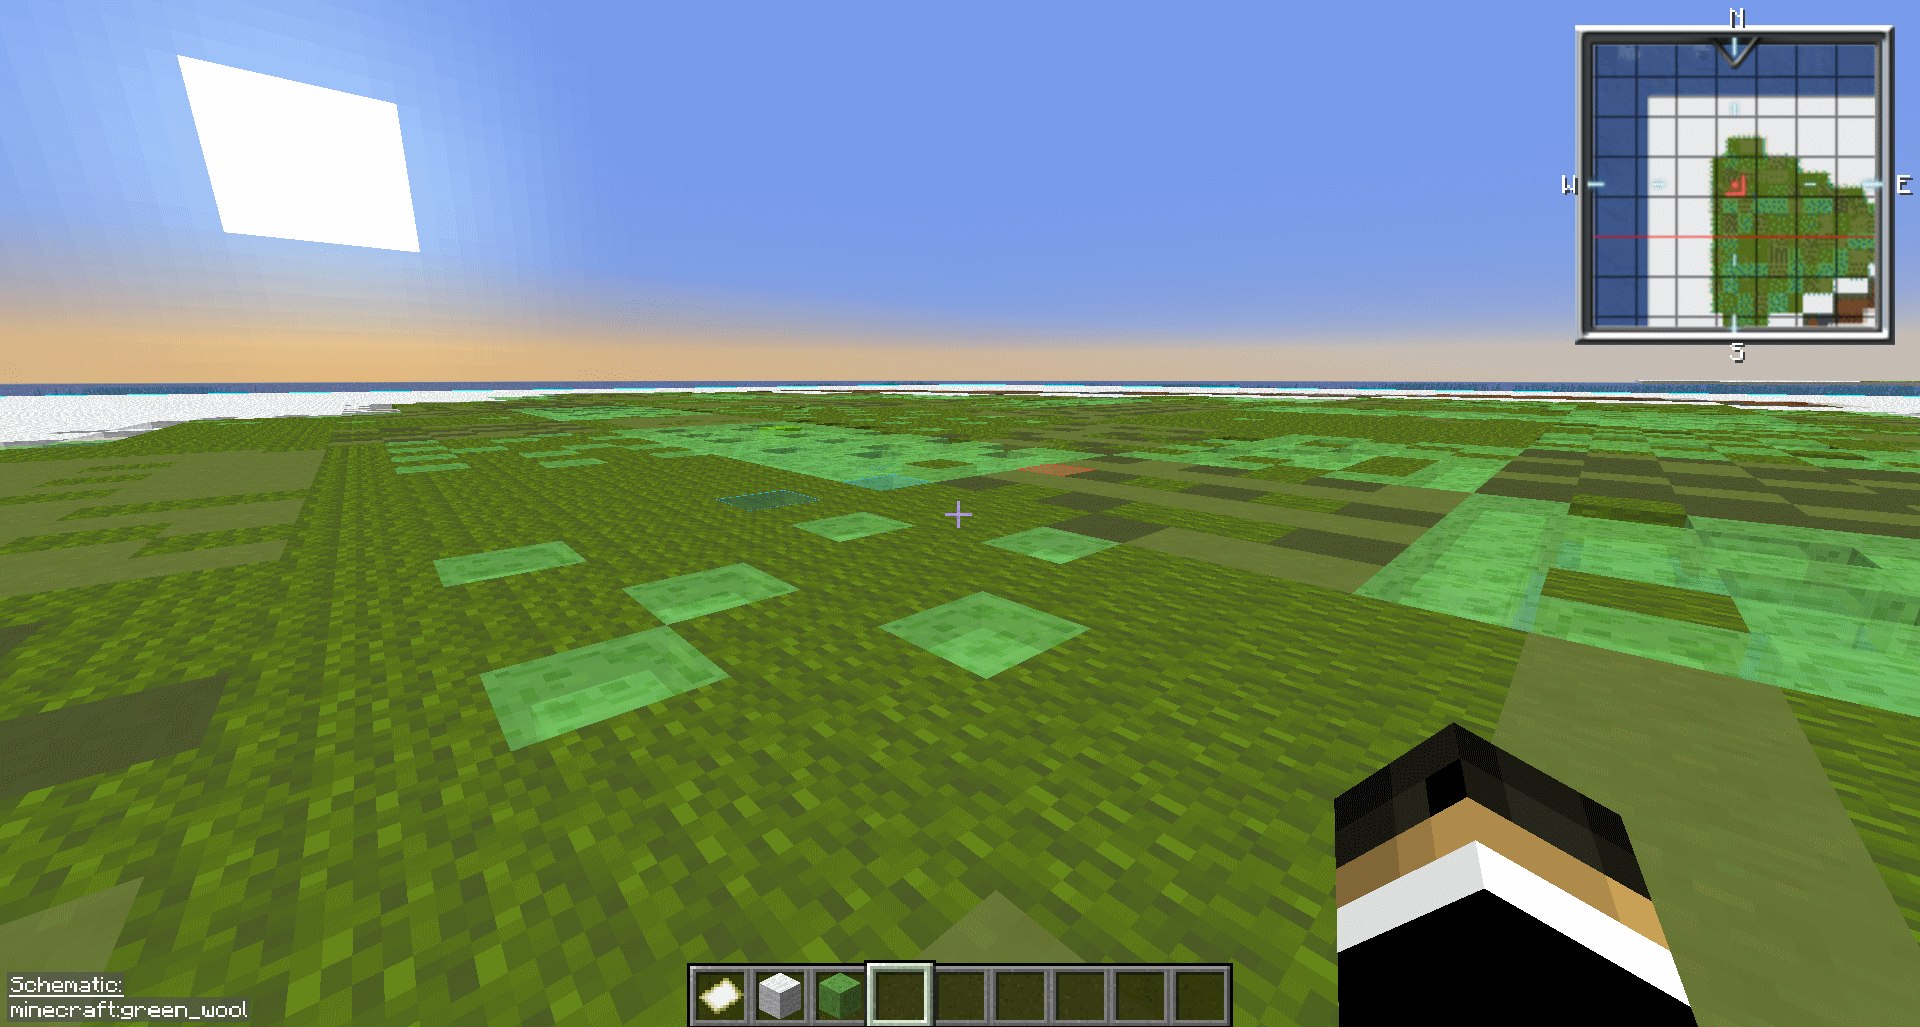
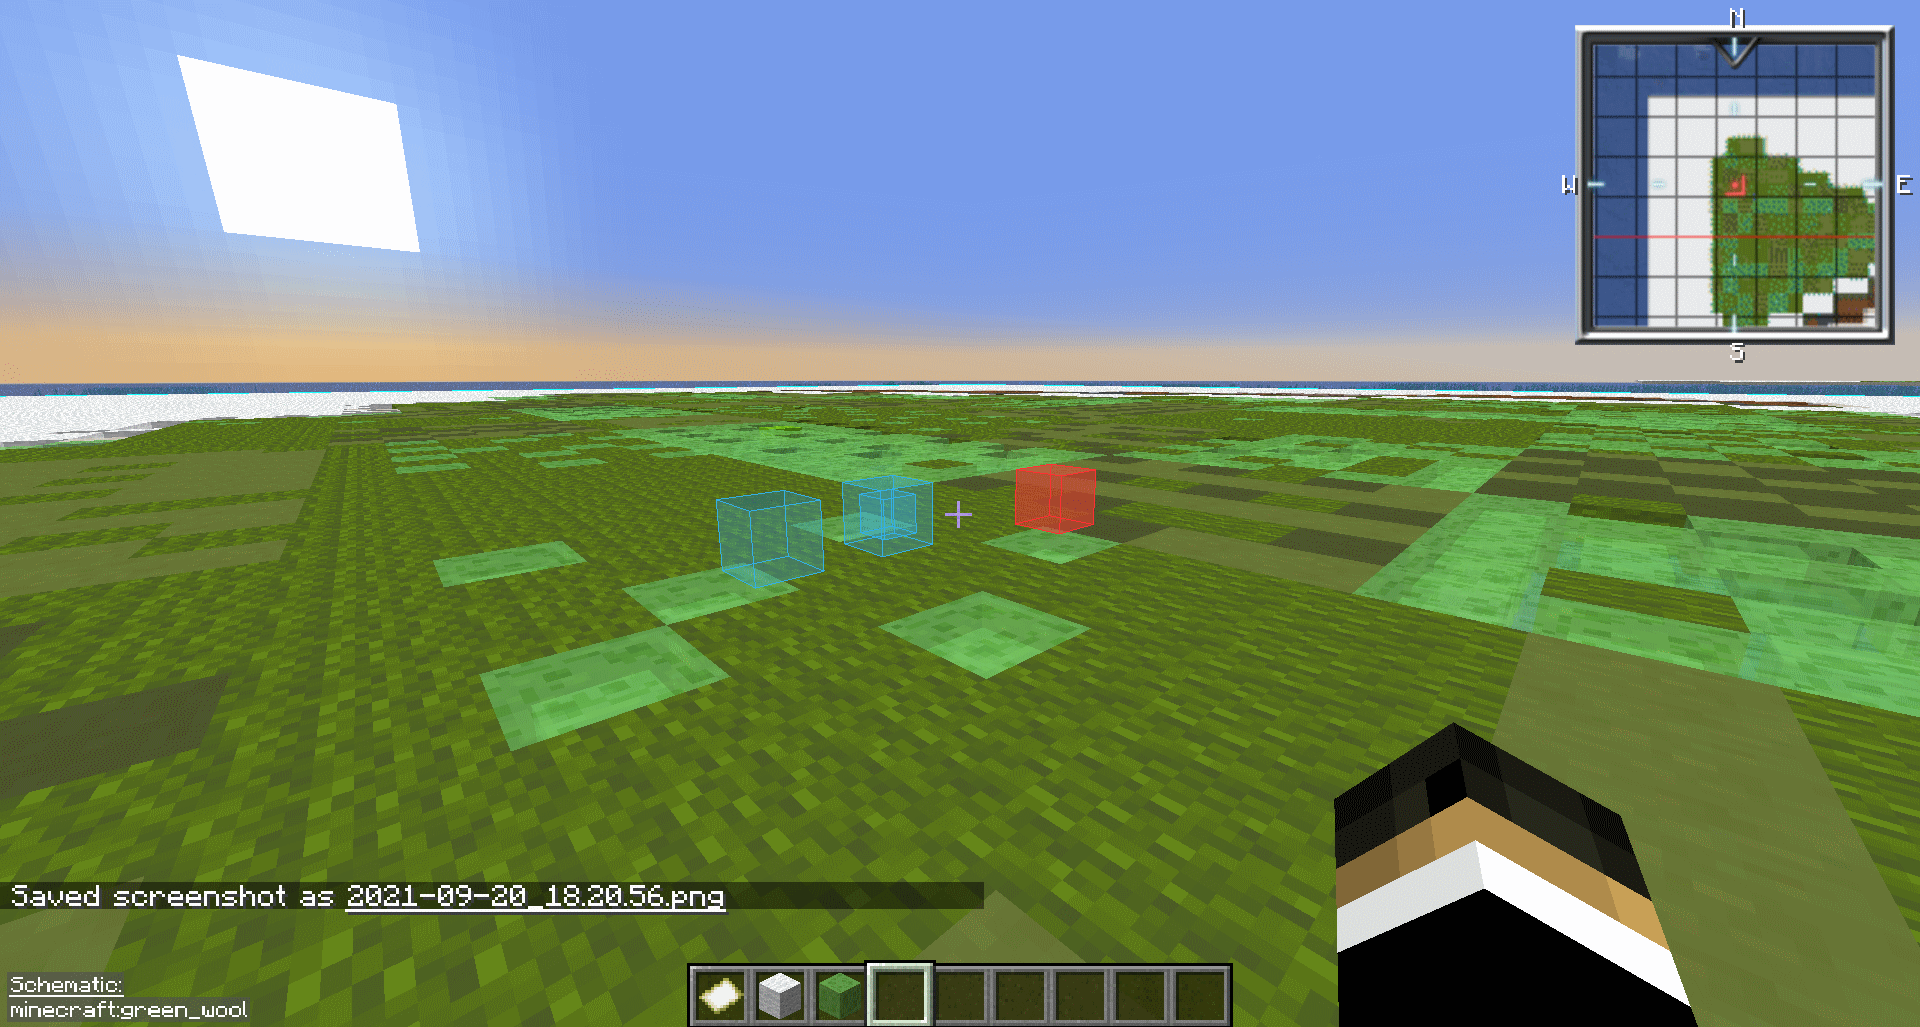
¶ Litematica's renderOverlayThroughBlocks feature
Sometimes, you want to easily check what blocks near you are missing or wrong. You can hold Right-Ctrl hotkey for that, which activates the renderOverlayThroughBlocks configuration and adds translucent borders to blocks not yet placed or wrong:
¶ Litematica's Schematic Verifier feature
After the schematic is built, use the Schematic Verifier feature to check overall for missing or wrong blocks, so you don't have to go through the entire schematic holding Right-Ctrl. However, before that, relog or change dimensions (you can use /hub) so all blocks on the client side are refreshed.
When being near the area:
- Open the Litematica main menu (M key)
- Go to
Schematic Placements - Make sure the schematic is highlighted, having a light gray border (if it is not, click on the schematic)
- Click on
Configurebutton - Click on
Schematic Verifierbutton (M+V hotkey) - Click on
Start verificationbutton
You may then click on categories (Wrong Blocks, Wrong States, Extra Blocks, Missing Blocks) or on individual blocks and Litematica will add borders to help you reach those blocks.
You may also want to ignore some blocks (for instance, Mushroom Stems may trigger wrong state).
Do not mindlessly ignore Extra Blocks, as anything above your map art will be shown in your map.
If you use wood logs (Birch Log for instance), pay attention to Wrong States. However, it's best if you switch that material to an equivalent easier one, for instance
Birch Log (Horizontal)toDiorite Slab.
As of Litematica version >= 20210903.004214, easyPlace no longer conflicts with Schematic Verifier, so you won't need to turn it off anymore.
Check this video for reference:
¶ Displaying the final art
It's a good idea to use a Cartographer Table and combine your filled Map with a Glass Pane to lock the maps from updates.
Afterwards, you may add your masterpiece to the Gallery or display it in a town.
It's recommended to either use a Glow Item Frame or have a light source block behind an Item Frame (Sea Lantern or Glowstone are good options).