This page is being updated and is not in a finished state.
¶ Guidebook
We are a joint-community Minecraft server that aims to create an enjoyable experience for all Hololive Production fans to interact and play Minecraft together. We are a server run by fans, for fans. We are not associated with Hololive Production or Cover Corp in any capacity.
To find what you're looking for, try using the search function (CTRL+F).
¶ Server Information
- IP Address:
mc.holocons.xyz - Both Java and Bedrock players can connect.
- When connecting, you will be asked to link your discord account with your minecraft account.
- The server consist of a Survival server, a Creative server, a custom Lowlands server, and a Hub server.
¶ Discord Information
- Discord server link: https://discord.com/invite/holocons (Permanent link is https://discord.gg/UUNsCKP3Ms)
- To recieve the full experience in the server, joining the discord is highly recommended.
- The discord server is used for community interaction, news, updates, support, and such.
¶ Discord linking
Linking your Discord account with your Minecraft account gives access to certain features. Follow these steps to link your account.
- Make your first attempt to join the Minecraft server. You should get a code.
- Message
@[Hub]HololiveConstructions#0589with the code you were given.
If you wish to unlink your Discord account, you must contact staff to do so.
¶ Contacting us
- To send feedback or submit bug reports publicly, use #suggestions-feedback. If you want to make sure your suggestion will be noticed, send us a ticket at #contact-staff
- To submit a report or contact us privately for any reason, send us a ticket at #contact-staff
- If you have any questions, use #questions-and-help or send us a ticket at #contact-staff
¶ Town Projects
There are a number of ongoing projects based on various Hololive members, such as themed towns and general groups who are a fan of a specific member. If you are interested in joining a town or project, please see the #towns-request and #community-board channel on the discord server.
Some towns and projects are not open to the public. To check if a town is accepting new recruits, visit the
#towns-infochannel.
¶ Recommended Client Mods
If there is a client side mod that you would like to be added to the list, please ask staff using the #contact-staff channel.
Any usage of mods that are determined to be giving any unfair advantages will result in punishment, as per rule 8.
¶ Performance Optimization (and related)
¶ Maps/Minimaps
¶ User Interface Improvements
¶ Information
¶ Inventory Management
Some mods may require Fabric API, masady's mods require Malilib.
¶ Banned Client Mods
You may not use mods that provide similar functionality to one or more items on this list.
- X-Ray Texture/Resource Packs
- Hacked Clients
- Better PvP Mod
- Baritone
¶ Survival Multiplayer
The survival server is based around vanilla gameplay with quality of life improvements. Within survival, there are two worlds: main and resource. Both contain an overworld, nether, and end dimension.
¶ Main worlds
Permanent worlds for players to build in.
Players are not permitted to destroy the environment to acquire resources. Use the resource world.
While main worlds are meant to be permanent, a Minecraft version that requires world resets may be released. We will try to find workarounds towards this issue, if it ever comes up.
World borders
Overworld: 24,000
Nether: 3,000
End: 10,000
Main (Spawn Area)
Spawn area in the main world comprise of two sub-regions: Central spawn and Outer spawn. The central spawn region cannot be edited by regular players.
This area contains shops, portals, and general server information. Outer spawn is freely editable by players.
Players may build here as an extension to central spawn.
Please note that staff will be monitoring this area and clean up builds as necessary to uphold our goal of having a community-built spawn.
Resource
- Resets every week on Tuesday, 14:00 JST. Reset may take some downtime for the server. Backups of this world will not be kept. If you build in it, prepare to lose it when the world is reset.
- Use these worlds to mine or excavate for resources.
- Can use /rtp to randomly teleport a large distance. (10 minute cooldown)
¶ Survival (Teleportation)
Players have access to various warp commands to teleport them to places in the world or other players.
Please note that the cooldown on player warps will be increased overtime as travel infrastructure is built.
¶ Static warps
/spawn - Teleports you to the spawn of your current world.
/hub - Returns you to the server hub.
¶ Player-defined warps
Main world
/sethome- Sets your current location ashome./home- Teleports you to yourhome.
Resource world
/setcamp- Sets your current location ascamp./camp- Teleports you to yourcamp.
¶ Player-relative warps
/tpa <player name> - Requests teleportation to a player's location.
/tpahere <player name> - Requests player teleportation to your location.
Cooldown is tied to the sender of the command.
Bedrock players need to use the
/tpacceptand/tpdenycommands to accept/deny telelport requests.
¶ Survival (Waypoints)
Players may create, register, and use waypoints to travel to various locations in the world.
¶ Waypoint Creation
- To create a waypoint first enter Waypoint Creation Mode with /waypoints create, you will have 30 seconds to place a banner on the location where the waypoint will be. This will create a Inactive Waypoint.
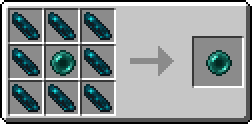
- To complete the waypoint you will need Waypoint Tokens, they can be crafted with 8 Echo Shards and 1 Ender Pearl. Left clicking with the Waypoint Token in your hand will use it add it to your token count.
- To add the token to the banner enter Waypoint AddToken Mode with /waypoints addtoken and right click the banner.
- When a banner obtains 7 waypoint tokens, it becomes a waypoint.
Players can remove and change the banner and block below the waypoint, it's recommended to claim the area.
Waypoint Usage
- Right click a completed waypoint to register it to your waypoint menu.
- /wa opens up your waypoint menu if you have registered at least one waypoint.
- Clicking on any waypoint in this menu will teleport you to it.
- Teleporting to a waypoint consumes 1 waypoint charge. You gain 1 charge every 10 minutes, and can store up to 12 charges.
Taking damage or moving during the teleportation will cancel it with no cost.
¶ Survival (Graves)
Upon dying, your inventory and some of your exp will be saved within a grave. This grave is protected and only you may access its contents. Empty graves will vanish.
You may shift + right click to empty the entire grave into your inventory. Please make sure you have enough inventory space before doing this.
The /graves command will locate all of your graves and its contents.
You may have up to 9 existing graves. Each grave lasts 3 hours before expiring and dropping its contents on the ground and vanishing. If you already have 9 graves, dying will not generate a new grave and items will drop normally.
¶ Survival (Container Protection)
All container blocks (chests, furnaces, etc.) are lockable. Signs and banners may also be protected. Locked containers are only accessible by you and trusted users you specify. This also prevents untrusted users from placing hoppers next to locked containers. Any previously existing hoppers that were already next to them will still function.
¶ Creating a locked container
Use the command /cprivate then left-click the container.
To specify trusted user for a container, use the command /cprivate <player name 1> <player name 2> <...> then left-click the container.
To create a password-locked container, use the command /cpassword <password> then left-click the container.
To create a public container, use the command /cpublic then left-click the container.
¶ Adding and removing trusted users
To add allowed users to a protected container, use the command /cmodify <player name 1> <player name 2> <...>.
To add a user and allow them to edit the protection on a container, add an @ before their name. (ex. /cmodify @<player name 1>)
To remove users from a protected container, add a - before their name. (ex. /cmodify -<player name 1> -<player name 2> <...>)
¶ Other commands
To view the protection info of a container, use /cinfo.
To toggle hopper interactions with a container, use /chopper on or /chopper off.
To remove the protection on a container you own, use /cremove.
¶ Survival (PvP)
By default, you may not attack other players. You may check your PvP status by using the command /pvp, and toggle your PvP status using the commands /pvp on and /pvp off. There is a cooldown on toggling your PvP status, and you may not toggle it while in combat. Please remember that indirect PvP (suffocating players with blocks, lava buckets, or any other method that doesn't count as PvP but may kill another player) against players with PvP disabled is forbidden.
¶ Chat System
This server is running a channel-based chat system. The chat is synced across the servers, and there will be an indicator where the chat came from. There are tons of channels set up. However you can only join the ones you have permission on. Some basic commands for the chat system is as followed:
/join <channel>to join and set your chat to a channel.
/leave <channel>to leave the channel.
/listen <channel>to join a channel, but not set your chat to the channel.
/ch <channel>to set your chat to a channel (functionally the same as /join).
/chlistto list all the channels you can join with its aliases. (Aliases are shorter terms of a channel you can use in the commands.)
¶ Survival (Other Features)
The number of players required to pass night time is reduced.
Mobs will stack into one entity if there are more than 8 of the same mob present within a 10x5x10 block cube region.
Mobs will stack up to 256 in one entity. Certain mobs will not stack even when the conditions are met. Certain mobs will not stack instantly after they spawn.
They require atleast 5 attempts of stacking to be able to be stacked.
Placing a Redstone Block under a powered rail turns it into a booster rail. They will accelerate minecarts up to 4x the vanilla speed (up to 32m/s).
We have a collection of Hololive-themed Minecraft items with unique effects and special abilities. To view them, visit holoitems-registry or do /collections in game.
We have a TPS saving mechanic that kills the AI of any villager in a 1x1 hole. This villager is lobotomized. Lobotomized villagers will still trade and level up.
All lobotomized villagers restock in 5 real-time minutes.
Villagers only get lobotomized if they can't move. A simple way to lobotomize a villager is to put them in a 1x1x1 hole and add a roof on top of them.
¶ Creative Multiplayer
We have a land plot-based creative world for players who are interested in creative Minecraft. You may use WorldEdit in your own plots.
The documentation for WorldEdit may be found here.
Players may only have a maximum of 4 separated plots. Use /plot help to view all the available plot-related commands.
To claim a plot, use /plot claim while standing on an unclaimed plot. To claim any plot, use /plot auto.
Unclaimed plots are marked with stone slab borders.
Claimed plots are marked with sandstone slab borders.
You can set your own time, weather, messages, and gamerules within your plot. Use /plot flag for more information, but some flags cannot be changed.
You can craft any custom items from our HoloItems plugin without needing to unlock it. You can also acquire said items using /acquire <ID>. To view every custom item ID, do /acquire.
¶ Socials
- Discord: https://discord.gg/UUNsCKP3Ms
- Vanity: https://discord.gg/holocons
- Twitter: https://twitter.com/HoloConsMC